Showing posts with label Christmas. Show all posts

Monday, December 15, 2014

Making Snow Angels!

Good morning & welcome to my (shell) day to show you my inspirational creation!

I absolutely love Nicole's Christmas images & especially this ubber cute monkey, called Sammy...


He is such a cutie!


You can find all the details of what I have used to create my card on my blog

You can purchase this super cute monkey here...

Sammy Making Snow Angels


I hope you have a great week
Hugs Shell xx

Monday, December 8, 2014

'Marleigha with her Reindeer'


 It's time for my weekly Inky Inspirational. This week I decided to have a play with one of the gorgeous images, released last month.
This is 'Marleigha & her Reindeer, is available here in digi form or here in rubber! I loved colouring this cutie in & watching them both come to life.

#4- Marleigha's Reindeer--- NEW RELEASE- DIGITAL STAMP

You will find full details of what I have used to create this card on my blog here!!


Such a cute image, I decided not to put a sentiment on it as I think the image says it all....

Hugs Shell xx

Monday, December 1, 2014

Cookies For Santa- Shell Swinscoe

Hi & welcome to my weekly Inky Inspiration post. Today I decided to show you one of Nicole's more detailed images & such a dream to colour! 
My blog is here for details on my card or scroll down as I have added the cards details to my post!


Image & Colouring Mediums
Image- 'Joey & Lynnie's Cookies For Santa' by Inky Impressions
Promarker/Flexmarker- words
Spectrum Noir Pencils- numbers
Sansodor
Lynnie
Skin- coral, sunkissed pink, blush & 08
Hair- buttercup, 90, 88 & 87
Dress- lavender, 79, 78, 114 & 113
Slippers- morning mist, 87, lilac, 80 & 82
Joey
Skin- coral, sunkissed pink, blush & 08
Hair- caramel, 104 & 105
Tshirt- 112, 73, 71 & 67
Trousers- 113, 112, 73, 71 & 67
Slippers- morning mist, 87 & 73
Table- cinnamon, 95 & 91
Cup- 18, 14 & 12
Goodies- 85, 89, red, azure, carmine & plum
Sign- 117 & 112
Carpet- 54 & 53
Wall- eggnog, 16 & 11
Rug & sentiment- frosted leaf, 59, ruby, 33 & 32
Sky- powder blue, 81, 73, 70, 69, 68 & 65
Window frame- 114, 113 & 112
Moon- 13 & 10
Curtains- frosted leaf, 60, 59, ruby, 33 & 32

Papers & Embellishments 
DP- 'Snowed In' winter papers by My Minds Eye
'Cookies For Santa' sentiment by Inky Impressions
My stash- red card, red ribbon, crochet flower & green card

Tools & Glues
'Collall' all purpose glue 
'Collall 3D' glue with tools 
Sizzix Bigshot
'Doily' die cut by Nellie Snellon MFD020
'5" square red card blank'

Thank you for taking the time to visit the Inky Inspirational blog
Hugs Shell xx


Monday, November 24, 2014

Merry Christmas From Lili!

Hi, it's my turn (Shell) to share my creation with you today.
As it's getting closer to Christmas I thought I'd share one of Inky's gorgeous Christmas images with you.....


I just love Lili she is a darling & such a dream to colour.

All details of how I made her can be found on my blog here!

You can find the digi image of 'Winter Mailbox Lili' here 

Winter Mailbox LiLi- DIGITAL STAMP

You can find the 'Merry Christmas' sentiment here

Merry Christmas To All Ticket- DIGITAL STAMP

Thank you for stopping by
Hugs Shell xx


Sunday, November 10, 2013

All is calm all is brigth

Hello friends: we are a few weeks away from Christmas, yay! so I Ruthie bring you a Christmas Card for your inspiration. I´m using the All Is Calm Sentiment Circle . Here it is.
I put yellow homemade glimmer mist then added Mogde Pod dimensional magic. Put the lace under the paper and its perfect as a embellishment.
 I stamped the music note stamp on white cardstock then I put vellum over. I like the effect.
 Here is the final look! Hope you like it!
 
Hope you are enjoying all this projects! We enjoy making them for you!
See you next Sunday!

Thursday, October 31, 2013

Thursday's Inspiration

Hey all, Lisa here to bring you a little inspiration on this Halloween day.

Nope...not a Halloween project...LOL

Think colder...think Christmas!

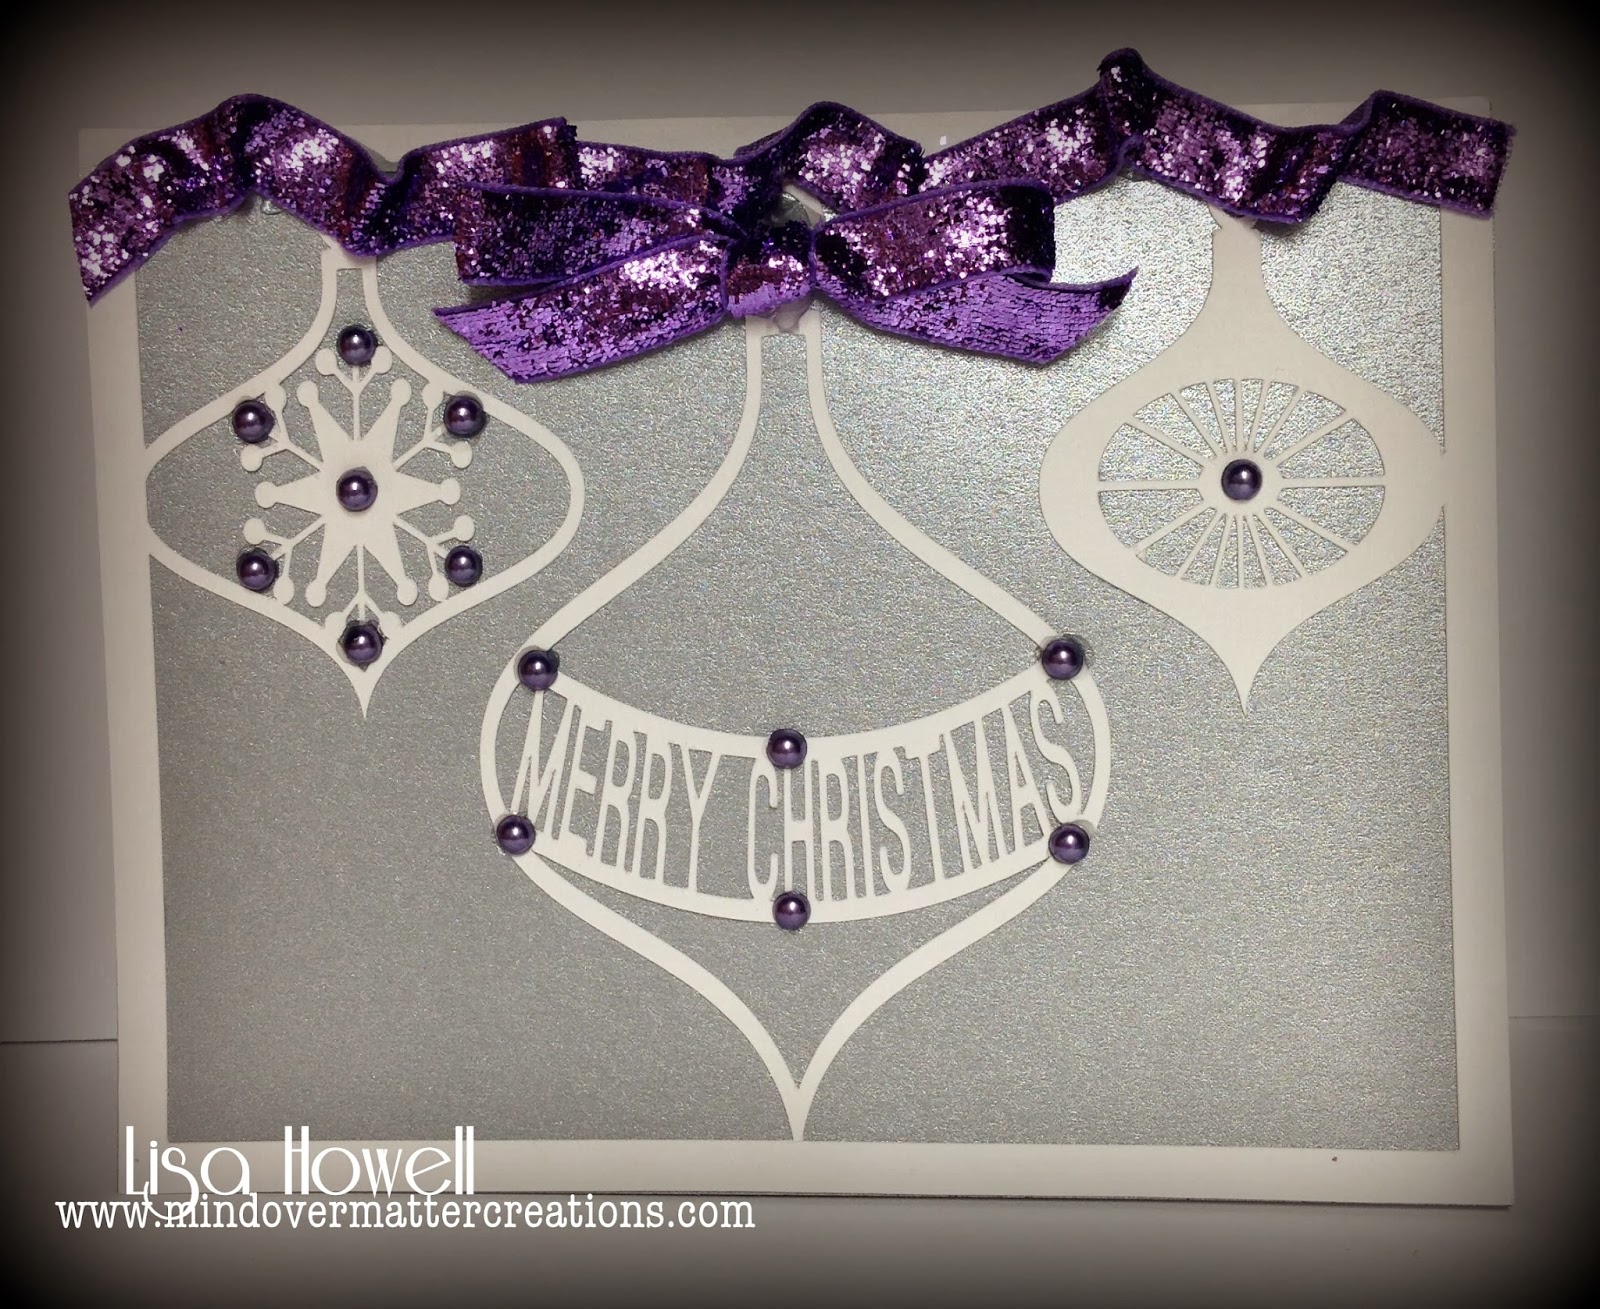
I have designed a cut file that I made into a Christmas card and used the Eggplant - 4mm flat back pearls from the store. 


I hope this brings you a little inspiration.

This will be my last post for the Inky Impressions Inspiration Blog. I have enjoyed my time here and wish you all a blessed and creative life. See you in blog land.

Lisa

Tuesday, October 8, 2013

Sophia's Sweet Snowman

Hi Everyone!

Lisa F. Here with your Tuesday inspiration!

This week I've chosen to use the adorable

 The image is colored with Copics, I've used a white gel pen for the falling snow, and Star Dust Stickles
for the snow on the ground and the sides of the snowman.

I've finished off my project by punching some branches
(Martha Stewart punch) and tying them together with Baker's Twine.  I also added a little jingle bell for fun.

The paper I used is from Christmas Lodge and the embossing folder both by Stampin' Up! (retired)

 I hope you feel inspired!
Join us a little later today for some more fab inspiration from Valou!

 Happy Craftin'
Hugs,
L


Tuesday, October 1, 2013

Tutorial: Creating a Reflection with Acetate

Hi Everyone!

Lisa F. Here.  Today I have a fun tutorial for you
on how to create a reflection.
I've used

Let's get started:
Step 1:
You will need a Stamp, Ink (Memento works best),Scotch Tape, and a sheet of acetate large enough to accommodate your image, card stock and makers (Here I've used Copics)
Step 2:
For this particular project, we don't want the swirls at the bottom of his feet,
so we will use Scotch tape to mask off that part before inking the stamp.
Step 3:
Ink the stamp with the tape in place
Step 4:
Peel the tape from the stamp, and stamp the image onto your card stock.
Step 5:
Repeat the process of inking up the stamp using the 
Scotch tape masking method.
Stamp the image onto your piece of acetate. 
Then quickly (but carefully) line up the bottom
of the two stamps as shown. 
Step 6:
 Carefully remove the acetate piece.  Your image should now look like
this:
Step 7:
Color your top image as desired,  When you color the
 bottom image or reflection,
choose lighter colors
 and blend outside of the lines (so it looks smeary).
A Blender Pen will also help.
Step 8:
Here I've added some glitter to create the look of 
snow around the iced pond.
Step Nine:
Finish your card.
 Notice that cute little Snowflake charm?
Those are available at

Hope you have fun trying out the cool technique!  Be sure to tune in later today for more fabulous inspiration!

Crafty Hugs,
Lisa