Showing posts with label Angelica's Daydream. Show all posts

Thursday, February 23, 2012

Sew Smart Cards


Hi, it's Joanna from Sitting on Pens here and I wanted to talk to you about sewing. It's not just for fabric anymore! Yesterday was my birthday, and my hubby gave me a new sewing machine! Yay! But I wanted to show you some things that you can do with a sewing machine that maybe you hadn't thought about.

This is the planning stage of making my card. I chose to use a sketch I had seen on one of my MANY laundry avoidance blurfing trips.

After I plan my layers, it's time to sew.
I just wanna say that this ---->
is NOT my new machine. I'm writing this post early and darned if he won't let me HAVE the new machine early. Rats.

A few tips for sewing:

1) You do NOT have to be an expert sewer! I am sooo not and it still looks GREAT.

My dog feels the need to lie between me and my sewing pedal so my stitches are OFTEN crooked. It doesn't matter.

2) Paper is tough on needles. I use a specific heavy duty needle and then ONLY use that needle for paper. I just switch it out when I sew on fabric.

3) I like to use adhesive to secure my paper to the backing. This way I only need to worry about making sure my seams are straight rather than worry about keeping the two papers straight.

4) I put a small piece of tape on the back to secure the stitching. I also cut out the backing. Since I like to layer, it makes it less heavy to mail and saves on paper costs. What can I say ... I'm thrifty.

My last bit of advice to you is not to worry about mistakes in your stitching. I made an oopie on one of my layers and just put a strategic button to hide it.

Sew there you have it ... the low down on sewing. I want to encourage you to get out there and try it!

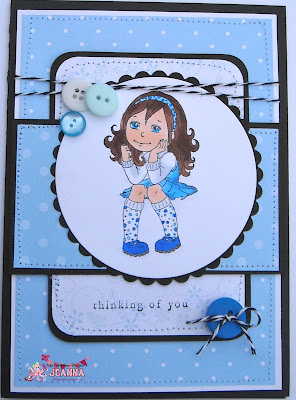
And before we go, I give you one more card to inspire. The stitches are slightly crooked (the dog bumped me, REALLY!!) but it is STILL cute!
Tuesday, January 17, 2012

DT Card - Dream


Hi,

I´m Domi and one of the new DT Member.

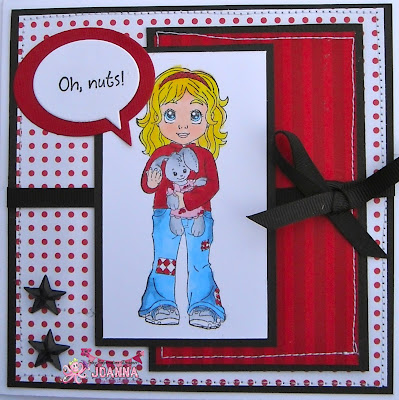
I want show you a card today.
This image is one of the fantastic Angelica Stamps.
Its called:

Angelica`s Daydream


Please visit the fantastic Store from Inky Impressions.

There you could find so many wonderful Stamps and other crafting items!

Have a fab Day.

Domi

Wednesday, April 6, 2011

It's Coming Up Daisies!!

Hello friends!!  It's my turn to post on the Inky blog today and I've been giving Spring much thought...probably because I've been patiently waiting for the warmer weather and the pretty flowers that come with it!
My attention then went to this image....
LOL!! Isn't she precious?!!  This is the darling Angelica's Daydream rubber stamp and I thought it would be fun to pair her up with daisies!  She's actually sitting in a circle ring of daisies too! :)
I was careful with the colors so that the daisy flowers would really pop out on the card...it's hard to see in this photo, but there is so much dimension on it.  I've cut out my image, popped her up on the flower ring and then popped that up over two different scallop circle layers.   I also thought it would be fun to make the bow ends twirl around the circle of daisies too.  So you see, Angelica is REALLY thinking hard about Spring here! LOL!  She can see it coming too!!

I've also used some of those yummy Inky Dinky Drops in the bottom corner too!  (Don't forget about all the luscious flowers, ribbons and goodies found on the website too!!)

I thought that I would play along in a few challenges with her as well:
Craft Your Days Away - Spots and Stripes (spots on image and stripes on white papers)
One Stitch at a Time - 3D...lots of dimension on image panel!
Craft Your Passion - anything goes

I would also like to remind you that there is still one more week left to play in the Inky Impressions Die Cut Challenge!!  So be sure to get your Inky Impressions stamps out and play along!!
Thanks so much for dropping in today!! Hope you were inspired with my creation and your thoughts are turning to Spring too!! :)  Enjoy your day!!
Smiles, Vicki

Monday, January 31, 2011

An Inky Tutorial for YOU!!!

Hello friends!  It's Vicki (Inspirational Inkette) here today to share a fun tutorial for you to try out using your Inky Impressions stamps!!

In case you are wondering why I'm posting over here on Nicole's blog, it's because this is going to be the NEW place where you can find daily inspiration from all of the Inspirational Inkettes!  We will be showing you tutorials, anything but a card projects and just other random fun things that you might want to learn about your gorgeous Inky Impressions stamps and accessories!  So please join us RIGHT HERE every day for something inspirational and be sure to follow us so that you don't miss a thing!

And if you try out ANY tutorials or anything you've seen here, please be sure to leave a comment with a link to your creation so we can check out what you've done! :)  So with all of that, I'm lucky to be able to post the first tutorial for you over here...so let's get started!!! 
**Please click on photos for a larger view**
Sometimes it's hard to see that images can be combined together to make a wonderful scene and all you need is a bit of your "usual" crafty tools to make it all come together.  I want to show how I've made a "Pot-O-Gold Background Scene" using a couple of the Inky Impressions images:
Step 1:  Here are a few things that you will need to create your background scene:
1) stamped, colored and cut out images of your choice.  Here I've used the adorable Angelica's Daydream rubber stamp and the Pot of Gold background rubber stamp.  (You will notice that for the bottom of my pot of gold image that I've torn along the bottom of it and sponged green ink over it to match up for the scenery that I'm getting ready to create.)  *A helpful tip is after you've carefully cut out your image, to go around the edge of them with a light grey brush tip marker (Copic) so you don't see those "white areas" along the edges of your image.*
2)  Preferably a white piece of card stock the size you want your card to be
3) A torn strip of card stock the same length or longer than your sized card stock piece.
4) Green and blue dye ink (this will be "grass" and "sky" colors)
5)  several sponges
6)  various colors of chalk

Step 2:  You will need to take your torn strip and place it towards the edge of your sized white card stock piece and sponge the area that you'd like to be "grass".  It looks up-side-down in the photo, but you will see why you do it this way in the photo below...

As you can see, you want the torn edge to be the top of the "grass" and you can size it depending upon your image and how you want it to look.  You can also take your marker and add "blades" if you wish. (See finished photo for these details.)

Step 3:  For the next step, you will need to create your "sky".  You will need another strip of torn card stock or flip over the strip you used for the grass.  Move the strip around on your sized piece by sponging blue ink over top of the torn strip and move it around randomly like clouds in the sky would be to create various shapes.  You can sponge lightly or more in certain areas for your preferred look.

When you are finished creating your "grass" and "sky", it will look something like this.  You can choose to stop here and add what you want to it or take it another step further like I'm going to show you.

Step 4:  This is where you will use your chalks to create a nice colorful rainbow effect!
I haven't attached my pot of gold image yet, but as you can see in the photo, I do want to use it for placement of where to create my rainbow.

I went off the left top edge of the sized card stock piece and rubbed different colors of chalk that would end where I'm placing my pot of gold image...and of course keep adding chalk as you desire.
*Tip - if you don't have a handle as shown in the photo, you can always use Q-Tips to apply the chalk.*

 And of course this is what my finished Pot-O-Gold Background Scene looks like when finished.  All that is left is to add my images and a few other touches.....

And here's what my finished card look like!
I've used my Copic marker and added some "grass blades" and attached my Pot of Gold image to it. (I've got it placed just right because I sized it up with my rainbow when creating it.)  I've also added some glitter to the coin pieces in the pot and then I've attached the Angelica's Daydream image on top of that.

The only other thing I did was add the Pot-o-Gold Sentiment to the top corner and then layered my sized white card stock piece onto a folded green card.

Thanks so much for stopping by today!!  I hope you've enjoyed this tutorial and will soon create your own background scene with your Inky Impressions stamps!!  Have a wonderful day!! HUGS